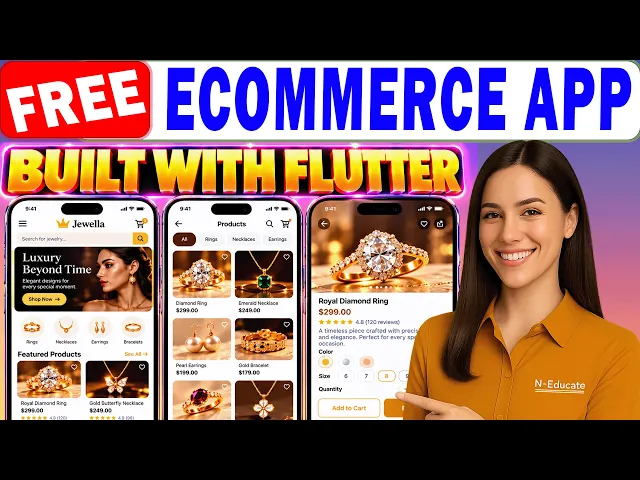
Build Flutter Ecommerce App with Admin Panel Using AI (No Coding): transcript
- N-Educate
- Added
- 16:32
- English
- auto-generated captions
AI summary
AI-generated from the transcript below. Check anything that matters against the video.
This tutorial from N-Educate shows how to build a Flutter ecommerce app with an admin panel using AI and no manual coding. The presenter starts by demonstrating a finished app, showing the profile screen, the password-protected admin panel, product editing, image changes from the phone gallery, and an APK installed and working on a phone. The process begins on GitHub, where the user creates a private repository and uploads a premium Flutter ecommerce template provided via a link in the description. Next, the user signs into Google Jules (referred to in the transcript as Google Julius), grants it access to the selected repository, and pastes a prompt from a linked document after filling in the app name and description. Jules works through the prompt, the user reviews the result, merges the pull request on GitHub, and waits roughly nine minutes for the APK build. The APK is downloaded from the release, installed via file manager, and tested, including theme switching, adding to cart, checkout, and admin order and product management.
Key points
- Create a private GitHub repository and upload the provided premium Flutter ecommerce template.
- Grant Google Jules access to only the selected repository through the configure repo access settings.
- Copy the builder prompt from the linked document, fill in app name and description, then send it to Jules.
- After Jules finishes, review the work, open the GitHub notification, and merge the pull request.
- Wait up to about nine minutes, refresh the page, and download the APK from the release assets.
- Install the APK through the phone's file manager and test the app, including theme switching and checkout.
- The admin panel is password-protected and allows editing products, changing images, and viewing orders.
Chat with AI
Ask about this video. Answers come from its transcript, with links to the moments they use.
Free with a Google, Telegram or email account.
Sign in to chatTranscript
- 0:00
Build flutter e-commerce app with admin panel using AI. So, as you can see, this is my flutter e-commerce app that I have built using AI, okay? And one thing is that you see that it is awesome, okay? It's awesomely built. So, we have all these options right here. Let me come and then tap on the profile for you to see. And when you tap on the on the profile, you have your admin panel right here that you can simply come and then tap on it, okay? So, when you tap on it, it is going to open just like this. You have your password right here. You can come and then tap on open admin panel and it will be open just like this. You have the option to edit by simply tapping on the edit option right here and you can edit any of the product, okay? You can simply come and then tap on the change image to change the image as well, okay? And then changing the image, you have the option to select from the pictures on your phone as well, okay? And that is awesome. Now, one
- 0:58
thing is that it also comes with its own APK that I can simply tap on it and then install it right on your phone. And as you can see, I've successfully installed it and it is working perfectly fine. Okay, so let me show you step-by-step how you can also build your own flutter e-commerce app just like this. Simply go to Google. From Google search, come and search for GitHub just like this and then hit enter, okay? So, when you come, simply come and then slide over to the site of GitHub by simply clicking on this one. That's the first one. It's going to bring you right here to the GitHub platform. So, you have the option to simply come here and then come and then sign up or create an account by simply clicking on sign up. I have an account already, so I'm going to go with the sign in by clicking on it. So, I click on it over here, all that you have to do is simply put in your email address, you put in your password, then come and click on the sign in. You can also come and then click on continue with Google and that will take you directly to your GitHub account just like this. So, when you are in your GitHub account, you have to come and
- 1:57
then create a new repo. And to do that, you can locate it from the top right-hand corner. You see that we have your profile icon right here. Come and then click on it, okay? So, after clicking on it, all that you have to do is simply come and then click on the repos, okay? And after clicking on it, over here, you have the option to simply come and then click on the new. And then, while you click on the new, you'll be able to create a new repo. So, as you can see, you have the option to come and then create a new repo right here. So, all that you have to do is simply come here to where you have the repo name and then come and put in the name. So, you can simply name it just like the name of your e-commerce app and then add Flutter e-com app to it, okay? Just like this.
- 2:36
And then, make sure that it is available just like this, okay? So, after naming it over here, where we have the description, just leave it empty. Don't put in anything there, okay? And then, come here to where we have the visibility. I want to see that it is set to public, okay? Simply come here to where you have the down arrow. Come and click on it and then come and select private by clicking on it, okay? And that is it. Private will be set. And all that you have to do is simply scroll down and come here to where you have create repo and come and click on it, okay? And that is it. Your repo is going to be created. And as you can see, it is created and it is now private. And that is perfect. Now, all that you have to do is simply come here to where we have the quick setup, okay? So, over here, I want to see that we have upload existing file right here. Simply come and then click on it, okay? So, after clicking on it, over here, you have the option to come and then upload your template, okay? And then, we are going to upload a premium e-commerce Flutter app template, okay? All that you have to do is simply come and then click on the
- 3:34
choose file, okay? And over here, this is the Flutter premium template that we are going to select. There's a link in the video description. Just click on it, download the template, select it just like this. And then, simply come here to where we have the open and then come and click on the open, okay? And that is it. Your template is going to be uploaded just like this. So, as you can see, we have successfully uploaded our premium Flutter e-commerce template, okay? And all that you have to do is simply come here to where we have the commit changes and then come and click on it, okay? And that is it. It is going to be uploaded. And as you can see, we have our template uploaded inside our repo. Now, all that you have to do is simply customize it, okay? And we're going to use an AI agent. The AI agent is called Google Julius, okay? So, all that you have to do is simply go to Google. And then from Google search over here, simply come and then search for Google Julius just like this, okay? And then hit enter. So, all that you have to do is simply come here to the first one.
- 4:31
And that is the official site of Google Julius by simply clicking on it, okay? So, when I click on it, it's going to take you right here to the Google Julius platform. So, from the top right-hand corner, I see that I have try Julius here. I come and then click on it, okay? That is it. It will bring you right here where you can come and then chat with Google Julius. But you have to make sure that you are within the repo that you just created. So, as you can see, I'm in a different repo. So, simply come here to where I have the down arrow and then come and click on it, okay? So, all that you have to do is simply come here to where we have the configure repo access and then come and click on it. It's going to bring you right here, okay? And then you can come and then give Google Julius permission to our repo. Come here to where we have the repo access, okay?
- 5:11
And then make sure that only select repos are checked, okay? So, if it's not checked, come and check the circle to check it. Then come here to where I have select repos. You see that I have the down arrow here. Come and then click on it. And then over here, all that you have to do is simply come and then select the repo that we just created, okay? And then this is that repo. Simply click on it and it's going to be selected just like this. Now, all that you have to do is simply come here to where I have the save and come and click on the save. And that is it. You have given Google Julius permission to your repo, okay? And that is it. Now, from here, you're going to see that we have the repo right here.
- 5:45
Simply come and then click on it to select it, okay? And we are within our repo. Now, all that you have to do is simply come and then give Google Julius the prompt to customize and then build your Flutter e-commerce app for you. You're going to find a link in the video description. Click on it, it's going to bring you right here to this prompt. All that you have to do is simply come here to where we have the Google Jurelis, okay? Google Jurelis Flutter e-commerce app builder prompt. So, you see that prompt that from here, all that you have to do is simply come and then highlight it from the top down to the bottom just like this. Come and then put the mouse on it, okay? Right click on it and then come and click on copy to copy the whole prompt.
- 6:23
Now that you have copied it, all that you have to do is simply open notepad, okay? And then come and paste in the prompt just like this. And come here, you have to scroll down, okay? And then come here to where we have the app information. You see that we have app name right here. So, under it, you see that it says enter your app name right here. So, highlight it and then write the app name that you prefer, okay? And then come here to where I have the app description. You see that we have enter your description right here. Highlight it and then write a detailed description of your Flutter e-commerce app, okay?
- 6:58
After that, highlight the whole prompt, right click on it, and then come and click on copy to copy the whole prompt. Now that you have copied it, come back to Google Jurelis, the chat, and come and paste in your full prompt inside it just like this, okay? So, now that you have successfully pasted in the prompt, all that you have to do is simply come here to where we have the send prompt, this one, and then come and click on it. After clicking on it, Google Jurelis is going to receive your prompt, and as you can see from here where we have the section, okay? Google Jurelis is working on it. So, to see everything, simply come here to where we have the view more, and then come and click on it, okay? And as you can see from here, it is in progress, okay? So, just give Google Jurelis time. It is going to take some time to finish it, and you can see the progress from the progress bar. As you can see, it keeps on increasing. So, when Google Jurelis is done, it is going to show just like this, and then you have to come and then review it. So, to review it, all that you have to do is simply come here to where we have ready for review, and then come and click on
- 7:57
it, okay? After clicking on it, it is going to open just like this. And as you can see, Google Jurelis has done all the work for us. Now, all that you have to do is simply go back to GitHub, okay? So, make sure that you are within your repo just like this, okay? And then from the top right hand corner, just close to your profile. See that I have the notification here? Come and then click on it, okay? By clicking on it, you are going to see the notification from Google release and this is it. All that you have to do is simply come and then click on it to open it, okay? Make sure that you have zero checks. There is no checks just like this. And then all that you have to do is simply scroll down, okay? And then come here to where we have no conflict with base branch. You see that we have merge pull request here? Come and then click on it, okay?
- 8:40
So, over here where we have the commit message right here, just leave it as it is. Where you have the description, leave it as it is. And then come down here to where we have the confirm merge and then come and click on it, okay? So, it's going to be merged. So, as you can see from here, it has successfully merged and closed. And then all that you have to do is to simply scroll to the top, okay? And then make sure that you are within your repo. So, from the repo name, simply come and then click on it. It's going to take you right to your repo. And you can see from here that it is pending, okay? So, Google release has done everything for us. So, it's going to build your APK for you so that you can install it on your phone. So, when I come here to where you have the release, as you can see, we don't have any release here yet, okay?
- 9:23
So, give it time. Give it up to 9 minutes, okay? So, after 9 minutes, you see that it is still pending just like this. So, you have to refresh the page. All that you have to do is simply come and then click on this refresh icon right here. And that is it. The page is going to be refreshed, okay? And as you can see from here, it was success. So, we have successfully built our APK. You can find it from the release, okay? So, from here, as you can see, before there was no release and then now we have one release right here.
- 9:52
And all that you have to do to download it is to simply come and then click on it. Right click on it over here, scroll down, and then come here to where you have the asset, okay? So, this is our APK that you can simply download and then install our app on our phone. So, you can see that we have the size right here. And that is it. Now, all that you have to do is simply come here to where I have the link, okay, and then come and click on the link, okay? And after clicking on it, you see that it's going to be downloaded, okay? So, as you can see, it is downloading. Just give it time for it to finish downloading, and we can then go ahead and then install the app on our phone. So, to install it on the phone, all that you have to do is simply come here to where we have the file manager, okay? And then come and then tap on it, okay? So, from here, where you have the off first come and tap on it.
- 10:39
Come here to where we have the internal storage, okay? And then come and then tap on it. After that, all that you have to do is simply locate the download folder. So, as you can see, this is the download folder. Tap on it, and then come here to where we have your APK. So, as you can see, this is the APK. Simply come and then tap on it, okay? So, after tapping on it, it's going to show up just like this, and then you have the option to simply come and then tap on the install to install your app, okay? So, it's going to be installed, and as you can see, we have successfully installed our app. You can simply come and then tap on the open to open your app. And as you can see, our Flutter e-commerce app has been built, and it's working perfectly fine. It is having our custom name and everything, okay? So, all that you have to do is simply come and then tap on get started, okay? And as you can see, it has successfully installed. It is working perfectly fine, and it's a premium Flutter e-commerce app. Now, all that you have to do is simply change the team color, okay? So, simply come to the profile, tap on it,
- 11:39
and over here, just scroll down, and then come here to where we have the app settings and teams, and come and tap on it, okay? So, after tapping on it, you have the option to simply come and then select light theme by simply tapping on the light, and that is it. It will change from dark to light just like this. Let's go back, okay? And then, from here, where we have our home, simply tap on it, okay? And over here, I want us to look through and then see if we can simply click on any product, okay? And then go through the check and see how it is. So, I'm simply going to select this by tapping on it, okay? And as you can see, when you select a product, this is how it displays, okay? We have the full image of the product right here, and you have the option to also change another to change it to another image by selecting any of the second image, and as you can see, it has been displayed.
- 12:33
So, all that you have to do is to simply come and then tap on add to cart, okay? After tapping on it, it is going to pop up a message just like this, okay? And all that you have to do is simply come and then tap on view back, okay? So, after tapping on view back, as you can see, it has successfully been added just like this, okay? Now, all that you have to do is that you have the option to apply a promo code by simply putting it right here, then you tap on apply, okay? And the person can simply go ahead the customer can go ahead and tap on proceed to cart or checkout, okay? And they fill in their payment details, they can come and then tap on place order, and as you can see, it has been successfully been placed, okay? So, that's awesome. One thing is that let's come here. So, you have the option to come and then tap on return to storefront by tapping on it, okay? And it will bring you right here to your storefront. One thing is that you can also come here to where you have the
- 13:31
profile and then tap on it. And then from here, where we have the settings, when you tap on it, over here, when you scroll down, okay? You have your admin panel right here. So, you can come and then tap on your admin panel, okay? And then you have the option to simply log in into your admin panel. You have your password, you can come and then tap on open, and it's going to bring you right here. So, from the top here, you have so many categories right here. I have so many options. You can find the order by simply tapping on the orders, okay?
- 14:02
Now, after tapping on it, the order that we just placed, this is it. You have the option to simply come and then tap on the down arrow right here, and you can come and then select any of these options just like this, okay? And one thing is that you can also change any of the product images by simply selecting product. So, as you can see, we have a product right here. You can simply come in and tap on the product, okay? And then all of these products that has been listed already, you can simply come in and edit it. So, to edit it, all that you have to do is simply come in and tap on the edit option just like this, okay?
- 14:37
And then you have the option to simply come in and edit the name, the price, everything you can edit everything, okay? And if you want to change the image, you can simply come and then tap on change. So, when you tap on change right here, you can simply come in and select the image that you prefer, okay? So, you can change this image by simply selecting some of the image that you have already, or you can come in and select it from your phone by tapping on select from phone. So, when you tap on select from phone, you can simply choose any image from your gallery just like this, okay? So, I'm going to select any of the image that I'm having in on my phone. So, I'm going to select any of these. I'm going to tap on this one, okay? I like this one. So, I'm simply going to tap on this one to select it.
- 15:21
And as you can see from here, the image has been changed to the one that I selected. To save it, all that you have to do is simply come in and tap on the save just like this, okay? And that is it from here. As you can see, we have successfully changed the image. So, to save it, simply scroll to the bottom and then come here to where we have this option and that is the save right here and come and tap on the save, okay? So, when you tap on it, that is it. We have successfully changed the image and you can go ahead and then change the rest of the image. You also have the option to come and then tap on add products right here just like this.
- 15:57
And then you can simply go ahead and then list a new product just like this, okay? So, you have the options to do anything that you prefer, okay? And you will see that when we go back to our storefront by simply tapping on the back arrow, let me go back again for you to see by simply tapping on the back arrow again. And let's go to the home by simply tapping on the home. You see that the image that we just changed has successfully showed up here. Okay, so this is actually how to build a complete Flutter e-commerce app. Like the video and then see you in my next video.
Questions
AI-generated, and answered only from the transcript.
What tools are used to build the app in this tutorial?
The tutorial uses GitHub to host a private repository with a premium Flutter ecommerce template, and Google Jules as the AI agent that customizes and builds the app.
How do you give the AI agent access to your repository?
In Google Jules, open configure repo access, make sure only select repos is checked, choose the repository you created, and click save.
How long does it take for the APK to be built?
The presenter says to give it up to about nine minutes, then refresh the page to see the successful build.
Where do you download the APK after the build succeeds?
Open the releases section of the repository, click the release, and download the APK from the assets.
How do you access the admin panel in the app?
Go to the profile, open settings, scroll down to the admin panel, enter the password, and tap open to view orders and edit products.
Can you change product images from your phone in the admin panel?
Yes. Tap edit on a product, tap change on the image, and choose select from phone to pick an image from your gallery, then save.
Related transcripts
Una specie di Coraggio | Valter Fraccaro | TEDxSiena
Nel suo intervento a TEDxSiena, Valter Fraccaro ripercorre la storia della conoscenza umana come espressione di coraggio. Parte da…
I worked for big tech—now I’m worried about AI | Dex Hunter-Torricke | TEDxBerlin
In this TEDxBerlin talk, Dex Hunter-Torricke describes spending nearly two decades advising powerful tech leaders and most recently leading…
What Happens When Everyone Can Build Software
This Lightcone episode features Paul Copplestone, co-founder and CEO of Supabase, discussing how the company has grown to 13 million…
Marc Andreessen: The Biggest Gap I’ve Seen in My Career
In this a16z podcast, Chris Dixon joins Marc Andreessen, Ben Horowitz and Erik Torenberg to announce that a16z crypto is being expanded into…
Amazon CEO Andy Jassy on Reinventing Amazon for the AI Era
In this a16z podcast, Amazon CEO Andy Jassy joins Ben Horowitz and Erik Torenberg to discuss Amazon's AI-era strategy five years into his…
Why OpenAI Is Racing to Make Computer Use Superhuman
This a16z podcast episode features hosts Seema Amble and Fabrizio Serafini speaking with OpenAI's Ari Weinstein and James Sun about…





Latest transcripts
Transforming our Autonomic Responses -- Grand Master Julie Scott
Grand Master Julie Scott of the Rosicrucian Order explains the autonomic nervous system (ANS) and how to transform its habitual responses.…
Initiation in Ancient Egypt - Grand Master Julie Scott
This video explores initiation in ancient Egypt, acknowledging that exact rituals remain unknown due to oaths of secrecy. Grand Master Julie…
In this video, I share 5 signs that pride is showing up in the way you communicate.
In this short video, Orator Walubengo lists five communication habits that he says reveal pride. First, picking up your phone while someone…
Your Money Habits Reflect Your Mindset!
In this short video, Orator Walubengo argues that small money habits reveal a person's mindset, claiming that folding or grabbing money…
The Art Beneath the Weapon | Nithin K & Shradha Rajeevan | TEDxMVJCE
This TEDxMVJCE 2026 talk and demonstration by Kalaripayattu artist and instructor Nithin K., with Shradha Rajeevan, presents the Kerala…
90° Parallelo | Luca Bracali | TEDxSiena
Luca Bracali, fotografo e documentarista con 41 anni di carriera e collaborazioni con la Rai e National Geographic, racconta la spedizione…